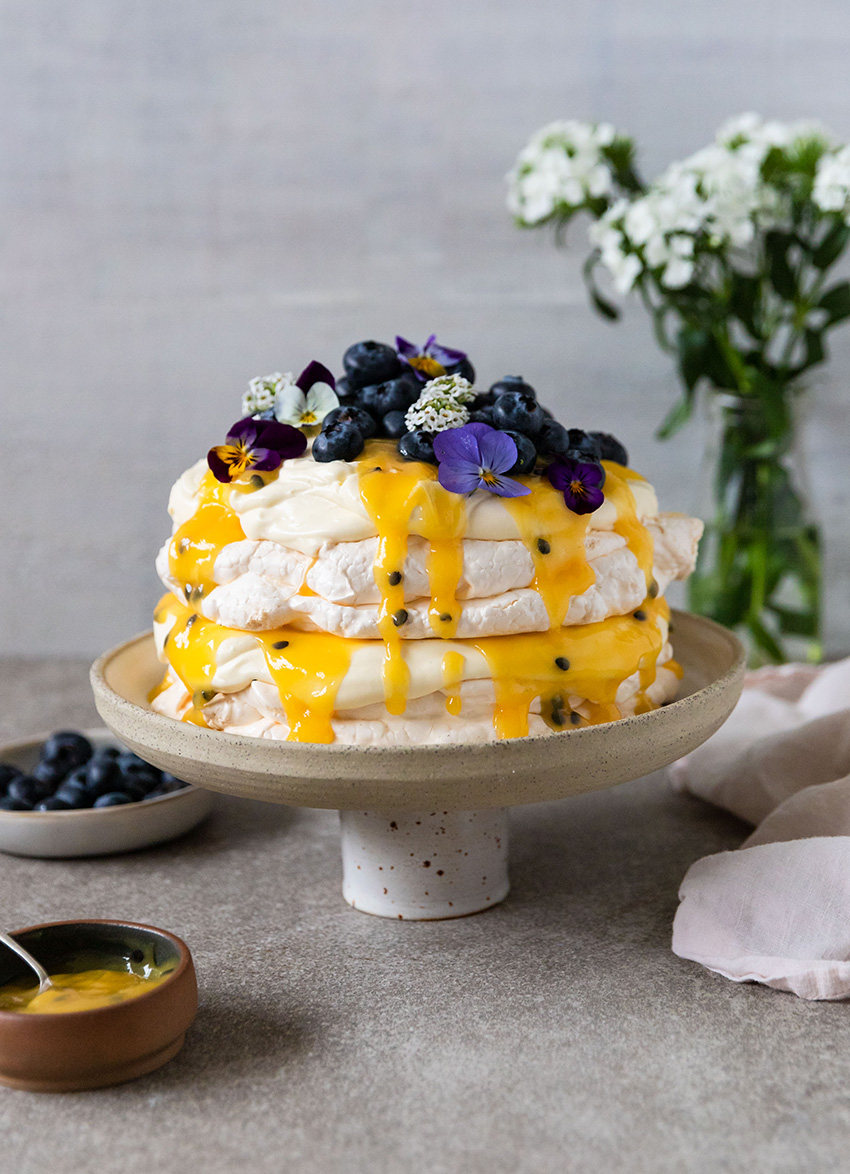
Layered Pavlova with Passionfruit Curd and Vanilla Cream

 BROUGHT TO YOU BY Otaika Valley
Serves: 6-8
INGREDIENTS
6 Otaika Valley egg whites
Pinch of salt
1 ½ cups caster sugar
1 teaspoon white vinegar
2 teaspoons cornflour
350g passionfruit curd (could also use lemon)
Vanilla Cream
250g softened cream cheese
350ml cream
2 tablespoons icing sugar
2 teaspoons good quality vanilla extract or paste
To Garnish: fresh blueberries or raspberries, edible flowers (optional)
METHOD
PAVLOVA: Preheat oven to 120 degrees Celsius.
Use an 18cm plate to draw 2 circles on the baking paper that you’ll be using to line your 2 oven-proof trays. Flip the paper over so that you’ll place the pavlova on the other side but can still see the outline through the paper.
Use a stand mixer or electric beaters to whisk the egg whites and salt until soft peaks have formed.
Sprinkle in the sugar one heaped tablespoon at a time, allowing at least 10 seconds between each addition. Don’t rush this step. Continue beating until all the sugar has dissolved. Test by pressing some of the meringue between your fingers to see if any crystals remain.
Add the vinegar and sift in the cornflour. Mix just enough to incorporate well.
Split the meringue mixture in half and spoon into the 2 circles on your oven-proof trays. Shape into 2 similar layers.
Place trays in the oven and bake for 1 hour. Turn off the oven and leave the two pavlova layers to cool completely in the oven without opening the door (at least 3 hours)
ASSEMBLY: Place the cream cheese, cream, icing sugar and vanilla into a bowl and use electric beaters to whisk until thick and smooth.
Place one pavlova layer onto your serving dish. Top with half of the cream. Spoon over half of the passionfruit curd, letting some drizzle down the side and lightly spread around the top. Place the other pavlova layer over this, top with the remaining cream and lemon curd. Finish with fresh blueberries and edible flowers if using.
COOK'S TIP: The baked and cooled pavlova layers can be stored in an airtight container for up to 2 days beforehand. Ideally assemble the finished dessert no more than a couple of hours before serving.
Keep up to date with
dish weekly recipes,
food news, and events.

latest issue:
127
In Dream Escape, we journey from Japan and Morocco to Italy, India and beyond, sharing recipes inspired by travel, heritage and comfort. We celebrate the champions of the Outstanding Food Producer Awards, explore the stories and recipes of chefs shaped by their cultural roots, and warm up with everything from West African soups and slow-braised lamb to porchetta, butter chicken and beef noodle soup. Alongside destination menus, Scandinavian sweets and cosy pub classics, Chrisanne Terblanche shares her favourite street-side dining spots in Bangkok, while Yvonne Lorkin explores red wine varietals. This issue, we invite you to slow down, turn the pages and escape through food.