How to Grow Microgreens

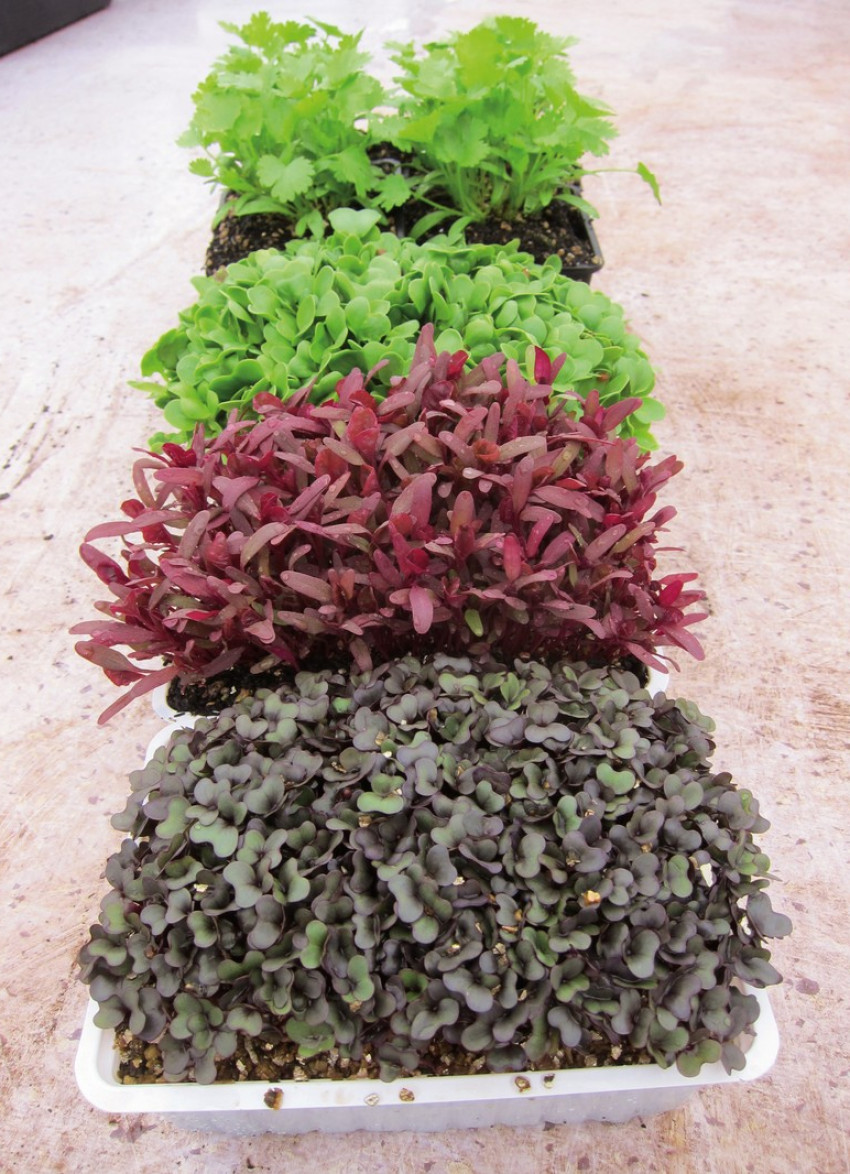
In Fionna Hill's latest book, she explains how to make the most of small outdoor spaces with container gardening. Here are her top tips for growing microgreens.
Commercial seed-raising mix is the best choice as a growing mix, but potting mix can be used if it does not contain large chunks like bark — it needs to be fine. A combination of the two will also work.
Organic seeds are preferable, although I do not stay rigidly to this rule. Buy seeds in small quantities first but in bulk once you find your favourites. I don’t buy blended seed mixtures or sow multiple crops in the same tray, as the harvest times are often different. I prefer to mix my leaves after harvesting.
Soaking seeds overnight can hasten germination, but do it only with fat seeds like peas, beet and fenugreek. Use shallow containers as discussed on page 16. You may find it is a good idea to have smaller containers which allow you to plant more varieties or have microgreens at various stages of growing so that you can have a continual supply. Experimenting is a good way to start.
• Fill your container (see page 60) to just below the rim with seed-raising mix. You don’t need a great depth of soil because you will be harvesting the plants when they are very young. About 5 cm (2 in) or less of soil will be enough, but the soil surface should be near the rim of the container as it is easier to cut the crop if stems extend above the edge. Some microgreens have beautiful long stems to cut. ‘Radish Rambo’ is purple and daikon is pure white.
• Smooth the soil surface, make it even and press down gently. Sprinkle the seed evenly and generously onto the surface of the mix. For large seeds like peas, plant ‘shoulder to shoulder’.
• Sift soil lightly to just cover the seed and press down gently. If you use soil to cover the seeds you may have some lifted up by the seeds as they germinate and this will need to be removed or washed out of the microgreens before they are eaten. It is not essential to cover the seeds with soil.
• Vermiculite is an alternative thin top layer to cover seeds to retain moisture and nutrients for good germination. Your crop will be less likely to damp off with this addition too.
• Water the seed tray either by standing it in a shallow tray of water or gently watering overhead. When seeds are first planted, gentle watering from above with a nozzle or a fine sprayer is preferable daily.
• Use a bottom-watering method once the seeds have germinated. This will help to avoid rot and mould growth.
• If you are growing in cool temperatures you may wish to bring your microgreens indoors, but in winter there are greens like brassicas that are happy outside. Most microgreens will tolerate temperatures from 16 to 27°C (61 to 81°F).
• Cover the top of the container for the first 24 hours with a paper kitchen towel — good because you can see when it is dry, and if you use towel coverings you may be able to keep your microgreens cleaner and may not have to wash them after harvesting. (Don’t use toilet paper to cover — it disintegrates.) Sheets of newspaper or shade cloth are okay and if using fabric, choose fabric that doesn’t have loops that will catch on the growing seeds. Keep the tray out of full sun to prevent the soil mix from drying out.
• Germination times vary according to the species you choose; some take less than a week. When the seeds have germinated, remove the paper or towel and place the container in light. To check progress you can peel a corner of the towel back; if the seeds are sticking to the towel, it is too early to remove it.
• Microgreens need light to grow and can be placed either outside in a sheltered position, or inside near a window so they can get light. Like most plants they will grow long and leggy if they don’t get enough light.
• Don’t allow seed to dry out but don’t overwater. Avoid watering in the heat of the day. Seed trays also need to be well drained for optimum growth and to avoid diseases, but they must have adequate water for the huge number of growing seeds.
• If necessary, protect pots from heavy rain, birds, slugs and other pests by placing a piece of clear plastic loosely over the top. Birds love my peas and can decimate a tray of them in hours, flicking soil all over the balcony.
• I sometimes use plastic elasticized food covers or lightweight shower hats but make sure that moisture is not collecting under the plastic and maintain good ventilation.
• Don’t be concerned if your microgreens appear to have grown some white fuzz on them. This is a normal part of the root-forming process and will disappear after the first day or so. Radishes always do so.
• ‘Damping off’ from a range of fungal diseases can cause the microgreens to rot at soil level and collapse, often for no apparent reason.
• Harvest when you are ready to eat the microgreens; tasting them daily will give you a sign that they are at their peak, but timing is difficult if you want them for a special occasion.
• You can, if you wish, harvest your microgreens at the cotyledon (seed-leaf) stage, harvest at first true leaf stage, or even let them grow on a little larger (the next stage up from microgreen is called baby leaf). Ten days to two weeks after planting is a guideline, but there are many variables.
• To harvest, cut with long-bladed sharp scissors.
• Cut microgreens can be kept in a closed plastic container in the fridge and will keep for seven days. However, do not refrigerate basil or amaranth.
• Stagger your growing times so there is always something coming on.
• Most microgreens can be harvested once only, except wheatgrass which can be cut when it is 15 cm (6 in) high and then again two weeks later, and peas can be harvested at either 7.5 cm (3 in) high or alternatively grow on to 15 cm (6 in) — cut only the tips and you’ll be able do this several times.

How to Grow Edibles in Containers by Fionna Hill is available in all good bookstores from April 1st 2015. Published by Bateman, RRP $29.99 © Fionna Hill
latest issue:
Issue #120
As the days become shorter, and the nights cooler, the latest issue is perfectly timed to deliver delicious autumn dishes. From recipes using fresh seasonal produce such as feijoas and apples, to spectacular soothing soups and super-quick after-work meals in our Food Fast section, we’ve got you covered. With Easter on the horizon, we feature recipes that will see you through breakfast, lunch and dinner over a leisurely weekend holiday, and whip up chocolatey baking treats sure to please. We round up delicious dinners for two and showcase a hot new Korean cookbook before heading south to Dunedin to check out all that’s new in food and dining.The latest issue of dish is on sale NOW at all good bookstores and supermarkets – don’t miss it!


